Dramatize a Travel Video Using a Split-Screen Video Effect
Are you an adrenaline junkie who goes on tons of high-octane travel adventures like skiing, skydiving, white water rafting, and so on? Or maybe you had a particularly action-filled trip hiking, biking, or something else? Sometimes regular travel videos don’t just cut it when it comes to emphasizing the intensity and dramatic nature of your adventures – which is where the split-screen video effect can really be extremely useful.
Multiple Perspectives of an Event
The advantage of split-screen video when it comes to action sequences is that it will allow you to showcase multiple perspectives of the same event. For example, for a sequence of you skiing down a steep slope you could show a side profile that will really demonstrate how fast you were going, a back view that will show your moves, and maybe even a head-cam that shows your perspective.
Frankly the options are close to endless – but with these multiple perspectives you could really show viewers what it was like, all at the same time. Of course, you’ll need to plan it out so that you have video footage of all these multiple perspectives that you’d like to show, but the end result should be pretty amazing.
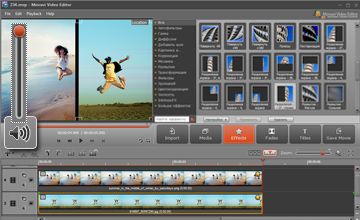
Choosing the Right Software
Once you have the video footage that you need, creating the actual split-screen effect is really all about choosing the right software. With video editing software like the Movavi Video Editor, you’ll find that it really is relatively easy to create this effect and all you need to do is:
- Click ‘Add Media Files’ and add the videos to the software.
- Add video tracks by clicking the ‘+’ button above the Timeline and selecting ‘Video Track’.
- Drag each individual clip onto a track of its own.
- Go to the ‘Effects’ panel, find the ‘Transform’ section and select the split screen effect that you’d like to use.
- Apply the effects to your videos one by one to create the final split-screen effect.
Once you’re done you can save the final video using one of the many presets that are available to optimize it. Because the Movavi Video Editor can do far more than act as split screen software, take advantage of it and crop, enhance, edit, trim, and even add special effects as required. Be sure to add a music track as background music too – it could really give it that special touch that is needed.
Image source: http://www.movavi.com/support/how-to/how-to-make-a-split-screen-video.html